Prerequisistes
- Access to a DXP Environment
- Access to Github
- Basic Understanding of CI/CD pipelines and YAML
- An existing CMS12 website connected to DXP
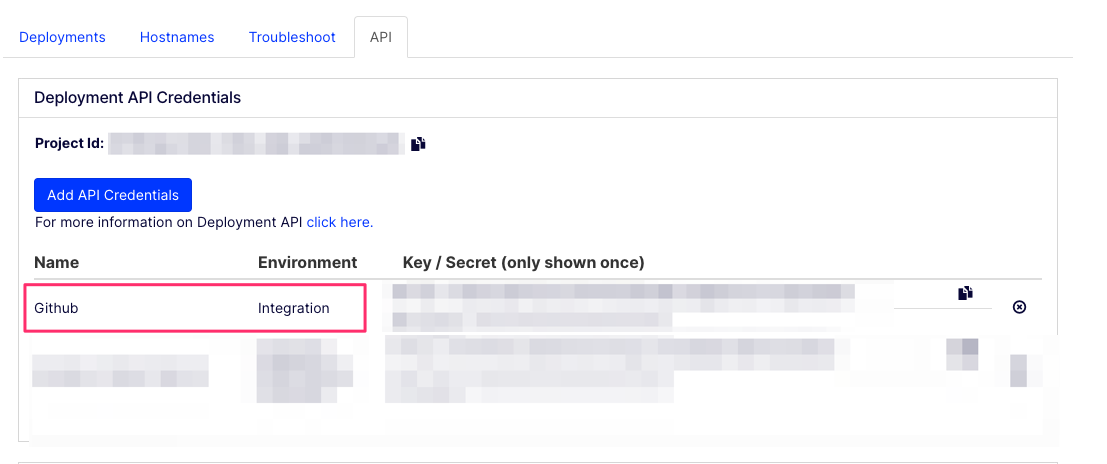
Generate API Keys
I’ve generated a seperate API Key for usage from Github which only has access to my integration environment because I want to deploy to production by hand and avoid “accidental” releases to production. You could however choose to let github deloy the site to the production environment if you like.
Preparing the github repo
The main thing that you would need to do in order to enable CI/CD in your github repository is the following:
- Create a .github/workflows directory in your repository on GitHub if this directory does not already exist.
- In the .github/workflows directory, create a file named dxp.yml
- Commit, Push and Pray (Praying is optional)
More information on Github Actions can be found here: Quickstart for GitHub Actions
TLDR; Workflow YAML
I’m using my own custom Github Runner on a Windows Server, in case you choose to go with the “free” minutes from Github try using a Windows based runner since the YAML file is using PowerShell commands. Although, I haven’t tested it myself in theory you can also run it on a Ubuntu based runner by adding shell: pwsh entry for each step in the workflow:
steps:
    - name: Check out repo
      uses: actions/checkout@v2
    - run: ./myscript.ps1
      shell: pwsh
If you just need the workflow yaml file here it is (Don’t forget to configure DXP_PROJECT_ID, DXP_API_KEY and DXP_API_SECRET in your github project secrets):
Github Workflow Breakdown
There are 3 jobs that drive the workflow:
- version
- build
- deploy
jobs: version
The version job generates a version number that is used as part of the build and deploy process to package the published output into a nice nupkg file
jobs: build
The build job takes care of performing the actual dotnet build (pretty stanard stuff there) including the following:
- generate a release
- package it into a zip file (yes, DXP takes a zip file with the extension .nupkg as it’s input for deployment)
- cache nuget packages
- cache powershell modules
- upload the artifact to be consumed for the next step
jobs: deploy
The deploy job installs and uses the EpiCloud powershell module to upload the package to the DXP environment and wait for the deployment to finish.
If you don’t want to wait for the deployment to finish you can remove the -Wait parameter at the end of the Start-EpiDeployment command
Conclusion
Connecting the CI/CD Workflows from Github into DXP is pretty easy and EpiCloud powershell modules make it a lot easier. The workflow deploys the webapp automatically whenever there’s a commit to the master branch of your repository
